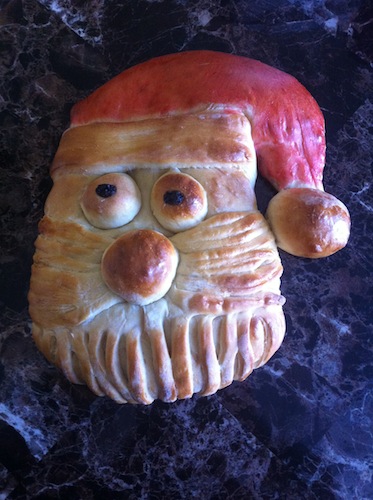
I had a blast making this Santa bread, and I know you will too! Let me show you how to make it with my step-by-step directions!
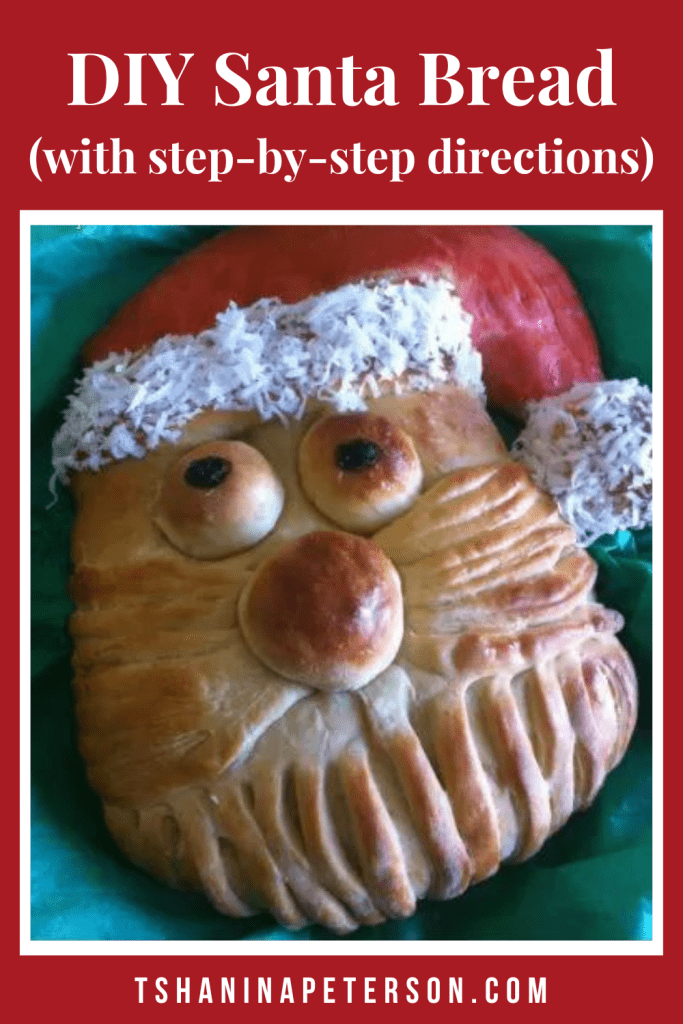
I felt like a little kid as I was making this Santa bread. No doubt I had a big smile on my face the entire time. Even as it was baking, I couldn’t help but peek in the oven to see how it adorable it was.
This diy Santa bread has quite a few steps, but I promise it’s not hard to make and won’t take very long to put together!
If you have a favorite bread recipe, feel free to use it. My recipe is below.
Step-By-Step Santa Bread Directions
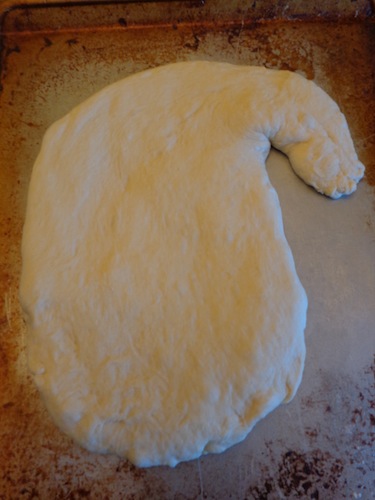
Base
Divide dough in half. (Keeping the half that you’re not working with covered when you’re not using it so it doesn’t dry out.)
Roll out the dough to form your base. Stretch the top of the base and curve it to one side to form a cap.
Place your base on a cookie sheet. (I sprayed mine with cooking spray.)

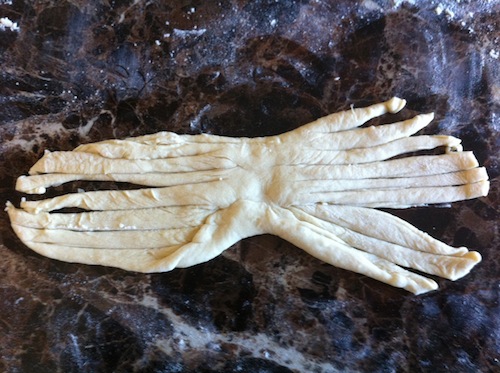
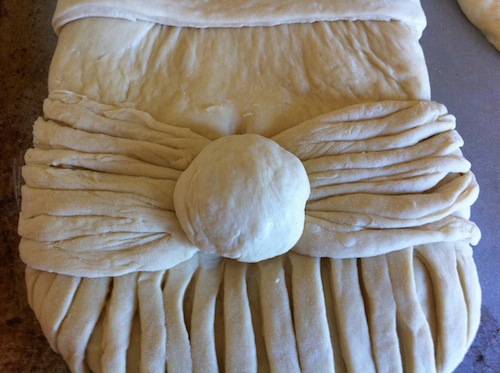
Beard
For me, the beard was the trickiest part, mostly because I’m such a perfectionist!
I found that the best way to get the correct shape was to roll out the dough and then measure it to the width of the base bottom.
Don’t roll your dough too thin, though, or it will get stringy and won’t puff up when you bake it!

Using a knife dipped in flour, cut thin vertical strips to make Santa’s beard.
Instead of dragging your knife to cut your strips, I recommend rocking your knife up and down in a rocking chair-type motion . (When I dragged it, the pieces became long, thin, stringy, and very hard to work with.)
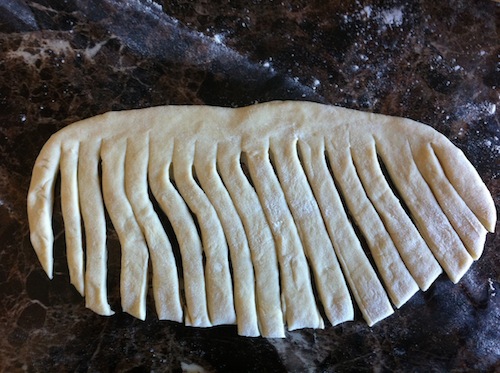
Continue cutting thin vertical strips the entire length of the dough, leaving a small strip at the top.
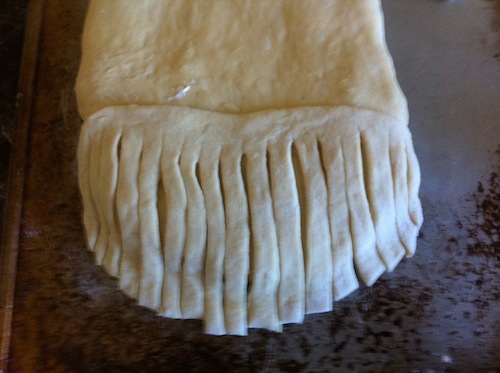
Place your beard on the bottom portion of your base.

Tuck any loose pieces of dough under the base to hide them.
Mustache
Similar to making the beard, roll out a piece of dough for the mustache.
Cut thin, horizontal strips on the sides.
Gather the dough in the middle to make it look like a mustache.
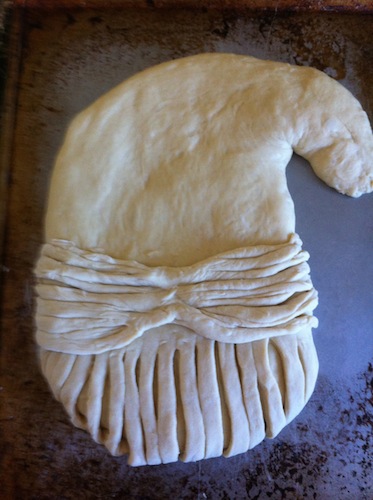
Place your mustache on your base, tucking any loose ends underneath your base.
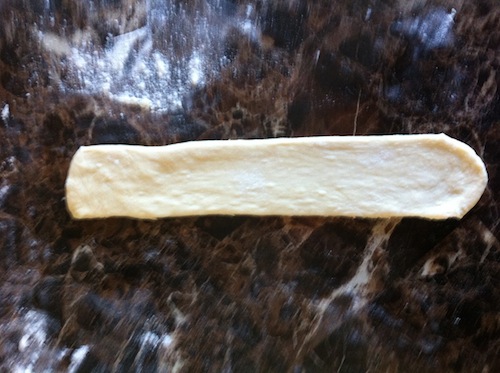
Hat Band
Roll out a strip of dough for your hat band. (If it’s too wide, trim it with a knife to your desired size.)
Place the strip of dough on your base and tuck the edges under your base.
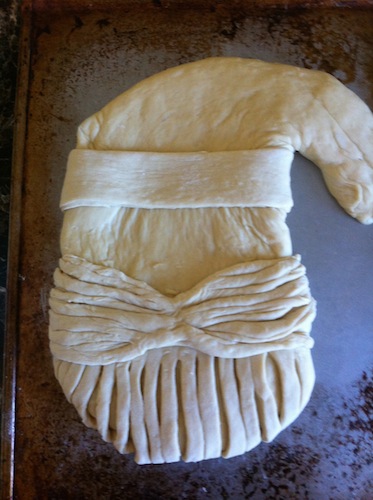
Nose
Roll a large piece of dough into a round nose and lightly press it in the gathered area of your mustache.
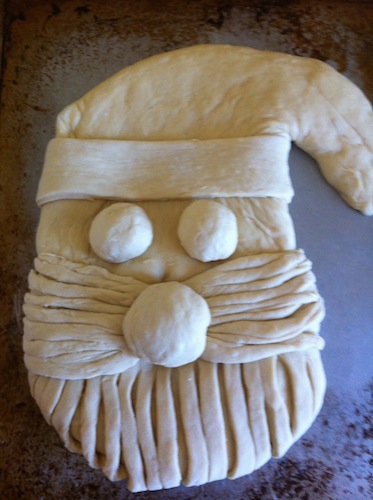
Eyes
Roll two pieces of dough into eyes and place above your mustache.
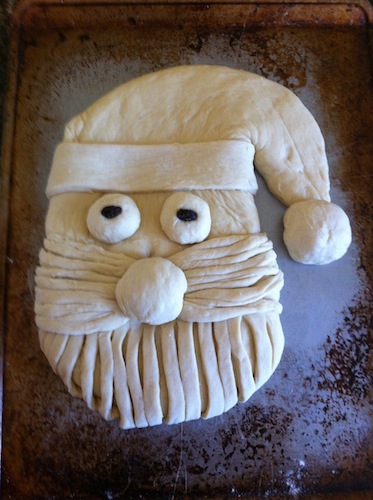
If desired, press raisins into dough for eyeballs.
Pom-Pom
Roll a large piece of dough into your pom-pom and attach to the pointed end of your hat.
Brush the face, hat band, and pom-pom with egg yolk.
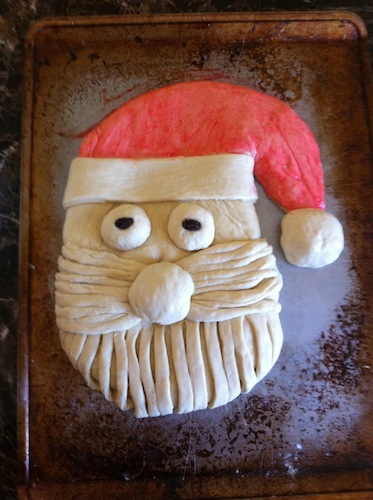
Add red food coloring to the egg yolk and brush hat.
Bake in a 350 degree oven until it sounds hollow when you tap on the bottom, about 30-45 minutes.
Cool on a wire rack.
I made my dough in my bread machine using the following recipe.
If you don’t have a bread machine, here are directions to make it by hand!
White Bread Recipe for Santa Bread
1 3/8 cups warm water
2 tablespoons melted butter
1 3/4 teaspoons salt
2 tablespoons dry milk
4 cups bread flour
2 tablespoons sugar
2 1/4 teaspoons active dry yeast
Combine the dry ingredients in the bowl of a heavy-duty electric mixer fitted with the dough hook attachment.
When it’s well blended gradually add the water until dough comes forms around the hook.
Continue mixing until the dough is elastic and pulls away from sides of bowl, about 3 minutes.
Turn out onto a floured work surface. Shape into a ball, cover with a clean kitchen towel and let rise for 30-40 minutes.
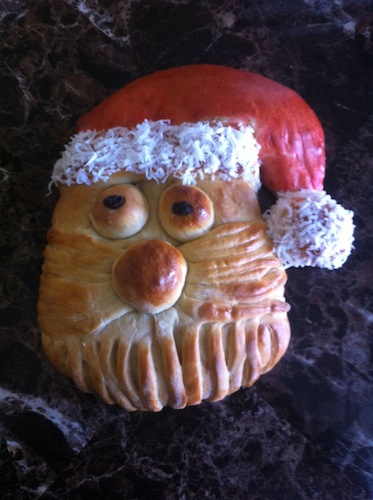
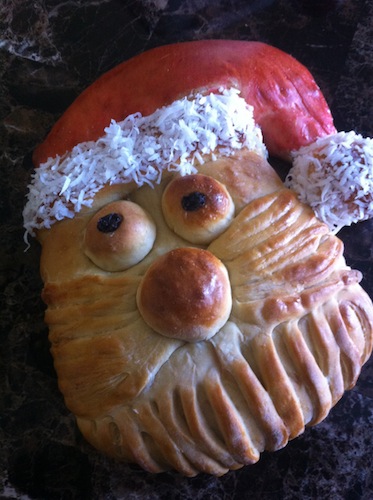
The Santa Bread is definitely cute just the way it is. If you’d like, you can dress it up with very little work.
Brush the hat band and pom-pom with apple jelly and sprinkle with coconut!
This Santa Bread makes a fabulous gift. You’ll love watching your friend’s and family’s faces light up when they see it!
If you enjoyed making this Santa Bread, you might also like:
- I had a blast making these DIY egg ornaments when I was a kid, and I know your family will too.
- Your kiddos won’t have to worry about being naughty or nice with these elf on the shelf alternatives.
- Count down the days to Christmas with one of these advent calendars for adults.
- Pop some popcorn and gather the family to watch one of these clean Christmas movies on Netflix.
That’s awesome! My daughter and I will have to try that. :)
I’m glad you like it Emily! The two of you will have a blast making this bread!
Looks great!
Thank you!
This is so cute! I have never seen bread made like Santa before :) What a perfect thing to take to a party. Definitely pinning this. And stopping by from Thriving Thursdays!
Thanks Stephanie! You’re absolutely right – this would make a perfect hostess gift!
What a cute and yummy project Tshanina! I might have to try this one even though I am not a baker! :-) Stopping over from Lovely Ladies Linky Party.
Thanks Julie! You should definitely make this bread – it was so fun!
This is absolutely adorable. I’m going to have to try it! Thanks for linking to the In and Out of the Kitchen Link Party. Hope to see you next time.
Thanks Cynthia! Have fun making it
this looks like so much fun, and very adaptable. i can’t wait to try it ;-)
It is a fabulously fun project, Janice!
Thanks for stopping by!
Can you assemble ahead and then put in the oven 24 hours later?
Although I’ve never tried making it the day before, I think you definitely could. My sister makes rolls the days before, puts them in the refrigerator, covers them tightly with plastic wrap, and they turn out beautifully!
Please let me know how it turns out when if you decide to make it the day before!
This is the cutest idea- perfect for kids!
Yes, and fun for kids of all ages.
Thanks for stopping by, Jessy!